Unboxing!

Oh, boy! Oh, boy!!

Lookie what came in the mail today…

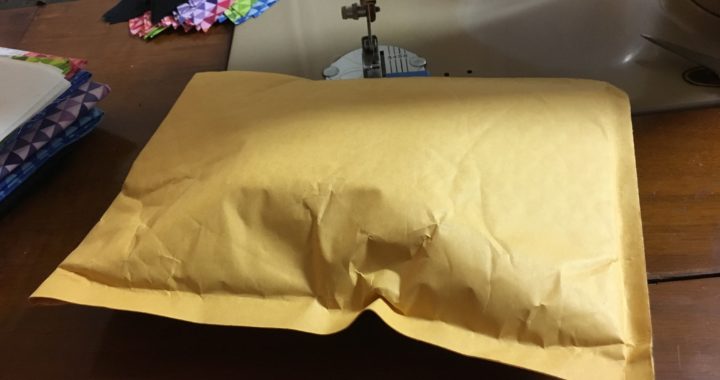
Package

Ooo… a package!


Hmmm….. how intriguing! I wonder what it could be.

Let’s open it!

Contents of package

What’s inside…?

A little more….

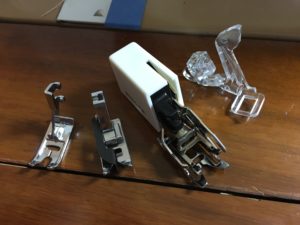
New Feet

All Purpose Presser, Stitch in the Ditch, Walking, Free Motion Quilting

New feet!!

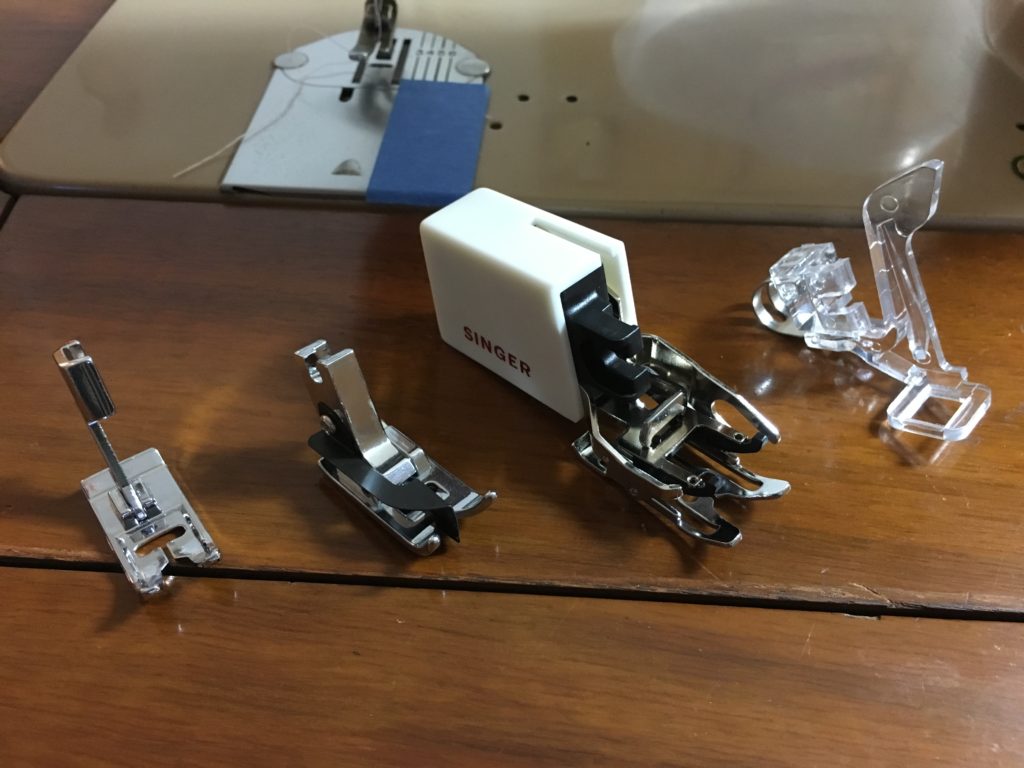
So, spoiler alert: I knew what was in there. And I was REALLY EXCITED to open it and show you!! From left to right in the photo, we have:

  • All Purpose Presser Foot– My Machine didn’t have one and I just wanted one so there.
  • Stitch in the Ditch Foot– With all of the quilting I hope to be doing, this foot will be really helpful for simple stitching in the ditch, or stitching along other seams.
  • Singer Slant Shank Walking Foot– I am SUPER excited to get a real walking foot!! It makes me feel super fancy and like a real quilter since its sole purpose is to help guide big, thick quilt sandwiches through the machine.
  • Free Motion Quilting Foot– I am ALSO really exited about this one. I have been binging The Midnight Quilt Show and watching her use her free motion foot makes me really want to try it and see what all the fuss is about.

There you have it! Many thanks to Sew-Classic for getting these feet to me in great condition and for great prices. Since my machine is a vintage, and on top of that a slant shank, it can sometimes be difficult to find the correct parts. I can’t wait to break these babies in and start quilting up a storm over here!

New Feet

Feet are fun! Well, sewing feet. Regular feet are gross.

A Pretty Sweet Design Wall

Space Saver Extraordinaire

Last time I was at Handmade Mama’s house, she showed me how she assembles her quilt blocks before she sews them together. I thought it was basically genius and knew it would be a great thing to share with you, dear readers!

Closet Design Wall

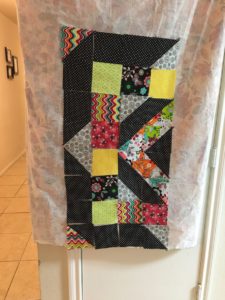
My Design Wall. I don’t have the foam boards, so I just shut the tablecloth in a closet door. It isn’t really big enough, though.

It’s often tough to find a large enough space to easily lay out your entire quilt, let alone find a place that’s easy to work and change things as necessary. This Design Wall, as it were, solved both problems by giving you a really large area to easily work on. It’s also super inexpensive and can be disassembled easily for storage.

What you’ll need:

1 Cheap Vinyl Tablecloth (the kind with the felt on the back)
Several Large Binder Clips (or Barbie Purses, as my sister and I used to call them)
2 Large Pieces of 4×8 Foam Core Board (like this or this)

Putting it together

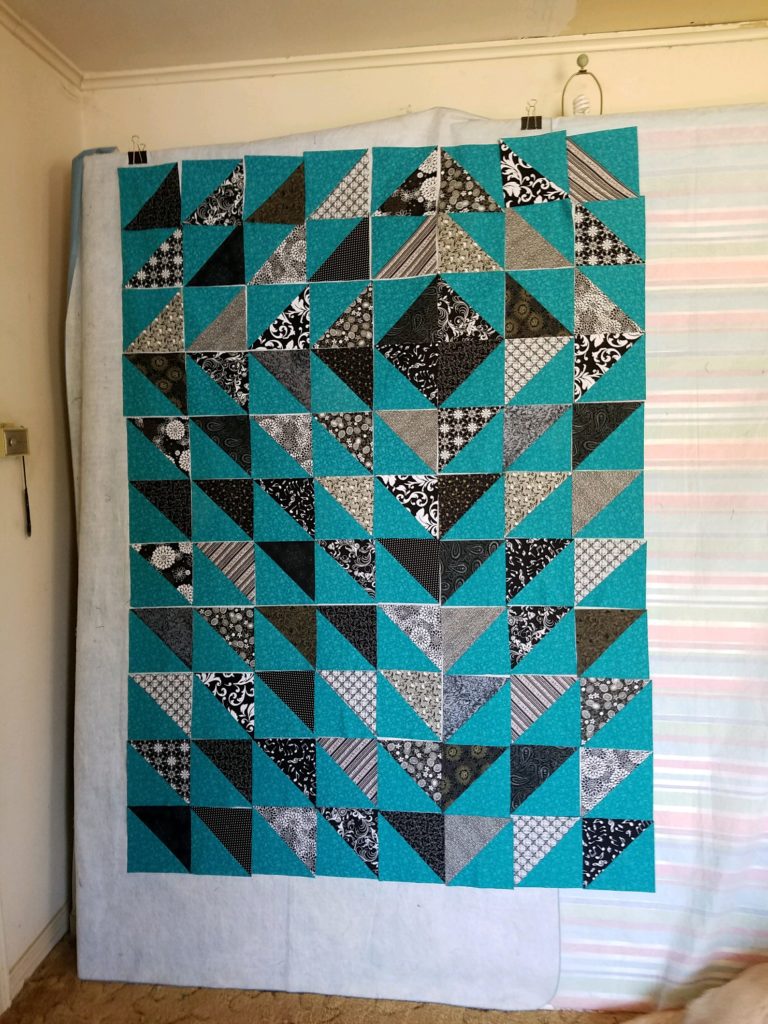
It doesn’t matter what the tablecloth looks like. I, personally, have been using one from a couple of Thanksgivings ago. All you do is clip the vinyl tablecloth FACEDOWN to the foam core boards and start putting quilt pieces on it. Just like MAGIC, they stick. It makes arranging pieces before you pin and sew very easy and allows you to see the full quilt and make any adjustments to the block placement super painless.

Design Wall

Design Wall. See the binder clips?

Then, when you’re finished, just put the foam pieces under a bed or against a wall behind a door for easy, out of the way storage. It’s a really great solution when you need a large area to plan your block placement. Hopefully this will help some of you guys with space issues!

A Geek’s First Quilt

Seeking Indoor Entertainment

Hello out there, everyone! With the impending hurricane potentially cooping us up in our house for a few days, I thought making a small quilt- or at least the top- might be a fun exercise! To give some context, I am reasonably competent with a sewing machine, although sometimes it’s not a great medium for me given my impatience and tendency to wing it through projects and not do things according to the actual instructions.

Whenever I feel crafty, I usually cross-stitch, and short of running out of thread or starting too close to the edge, there is not much that can go catastrophically wrong. Sewing, on the other hand, has MULTIPLE reasons it could go wrong at any turn! Or, at least, I feel that way. So I’m going to conquer my quilting fear, be exceptionally detail oriented, and measure twice before cutting. Here we go for my first quilt ever!

The Wind Up
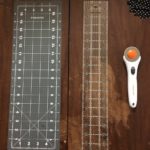
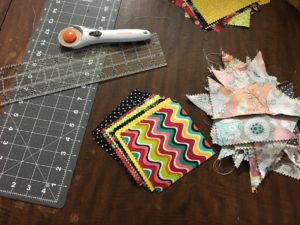
Rotary Cutter

Rotary Cutter, Board, and Acrylic Ruler

I got this crazy idea at about 9:45pm last night, so my fabric choices were limited to what was prepackaged at Walmart. Not terrible, but not a huge selection when you’re talking about JUST charm packs and fat quarters. I chose a couple of different kinds, some prepackaged batting, a rotary cutter/cutting board set, and an acrylic ruler. (I have plenty of thread at home, but that’s another important consideration!!) I came home and, because I insist on being different, designed my quilt top.

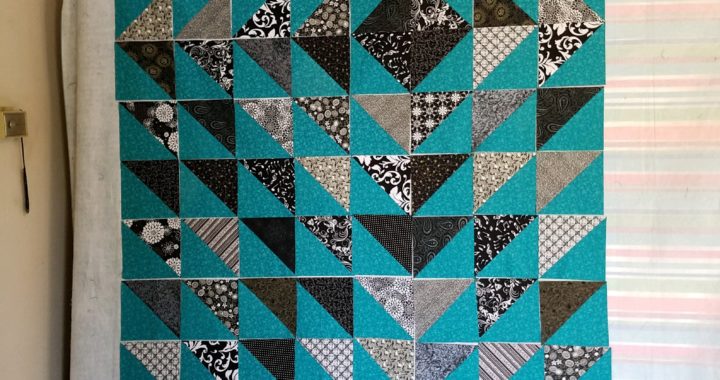
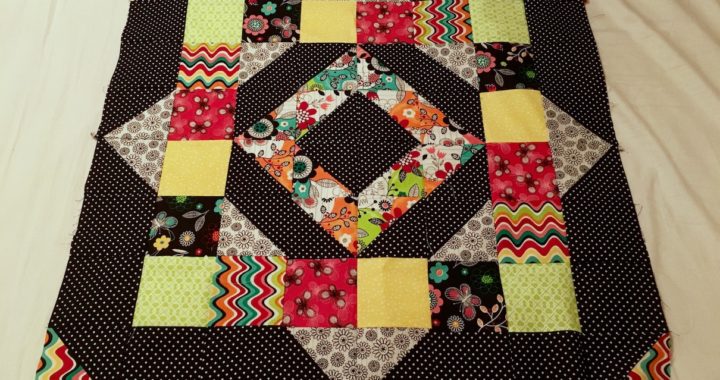
I have a few designs in the hopper, but I haven’t actually written out the patterns because I don’t really feel qualified. Hopefully, my experience this weekend will bolster my confidence enough to let me feel okay about writing out quilt pattern instructions. After some trial and error, I decided on a pattern using full squares and half square triangles. To lay out which prints would go where, used a combination of fabric on my design wall and super high-powered computer graphics software not at all intended to be used for this. The design wall would definitely suffice, but as I said: I like to be different. Here is the design I will be quilting:
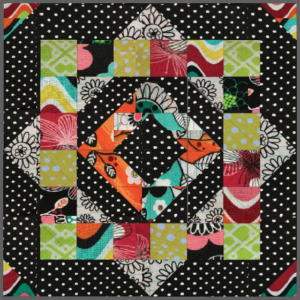
I can’t think of a name for my block! It feels insensitive to name it Harvey… :/

Those are actual photos of the different fabrics in the charm pack. It helped to simulate what the finished piece would look like and help me calculate how much I needed. Each of those little squares will finish at 4”, so the whole thing is kind of an odd size of 32” x 32”. Wall hanging? Centerpiece? Cat bed? Who knows. Whatever, this is more for the experience than the final product anyway.

Prep Work

Having already ironed all of my fat quarters that would be the “background” fabric, the next step was cutting them into 5” squares. Cutting Background FabricI have not had good results with a rotary cutter in the past- not in a dangerous way, just in a going too quick and messing fabric up way- so I was hesitant to do this part. I wish I had Handmade Mama’s fancy die cutter. That thing would make quick work of these little squares. Anyway, having not used a rotary cutter in a LONG time, and really wanting to do it right, I did what anyone would do: consulted Youtube.
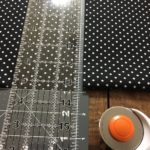
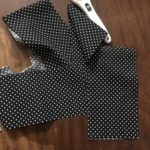
Background Strips

Background strips before cutting into squares.

This video was very helpful, and with a helpful tip from Handmade Mama about stacking the strips at the end, it wasn’t so bad. Got all of the background fabric cut and ready to start sewing!! Eeee! So excited!!

Assembly
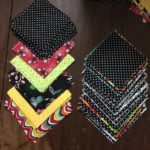
So I paired up the background squares with the right fabric from the charm pack and matched them up wrong sides together. Then, the directions are to draw a pencil line diagonally across the back of the fabric, sew a 2 seams, each 1/4” on either side of that diagonal line, and then cut along the pencil line. What you’re left with are 2 4 1/2” squares with one triangle of background fabric, and one triangle from the charm pack. Seems easy enough.

Well.
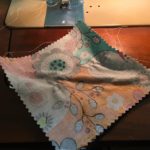
Thread Tension Problem

Thread Tension Problem

Sidebar:

I really do like my sewing machine. It’s a vintage Singer 500A, otherwise known as a Rocketeer. It’s heavy duty and even though it was made in 1960’s, it sews like a champ and if it starts to get wonky, I know a guy at a local shop who will refurbish should I decide to do that. That said, I have pretty much always had issues with the thread tension. I don’t know why, but I have never really been able to get it right. I usually just press on, but in the interest of being very particular, I called Handmade Mama to try and help me fix it.
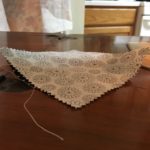
Squares Curling at Edges

Squares Curling at Edges

What was happening was when I sewed across the triangle, the thread was too tight or something and it was making the squares curl at the edges. What I didn’t realize until later was that it was also moving the fabric on the underside around in such a way that it wouldn’t have made even, equal squares, anyway.

After Mama talked me down from my swearing, getting ready to give up ledge, I changed the sewing machine foot and it corrected the problem. However, I had put together all but one of my squares, so now I get the pleasure of ripping almost every one of them apart and re-stitching them. Hooray.
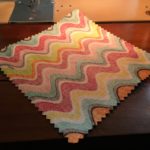
Flat Square

Flat Square


The Do Over
Cutting Half Squares

Cutting Half Squares

Re-stitched the squares so that they laid flat, and then used the rotary cutter to cut diagonally along the pencil line, as per the instructions. Then, in what is becoming a regular occurrence, I looked on YouTube for instructions on how to properly iron the half square triangle so that they would lay flat in a square shape. As usual, Youtube has everything, so I watched the video and got to pressin’.

It is at this point that I am noticing the pinked edges of the charm pack are making some of the squares feel a little wonky, so in the future, unless I need a full 5” square, I’m going to cut the pinked edge off and let it be straight.
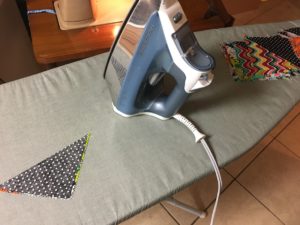
Pressing Half Squares
Pressing Half Squares

Design Wall Quilt

Design Wall Quilt


Putting it Together

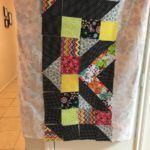
After pressing all of the squares, I put the quilt together (well, all that would fit) on the design wall. From there, since this wasn’t an overly complicated pattern, and the squares were pretty big, I just picked up each square from the first column- in order- and stitched them into one long complete strip. Then I did the same with each column after that. If the pattern was more intricate, I would have pinned the pieces together end to end so I didn’t get them out of order or turned the wrong direction.
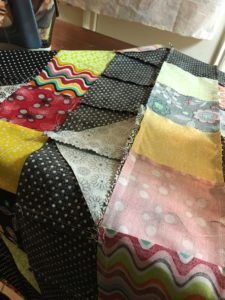
Nested Seams

You can see the way the horizontal seams nest along the vertical seam.

Then Mama gave me some more advice I wouldn’t have thought about: when you press the seams of the long strip, alternate the direction from one strip to the next, and then the seams “nest” when you sew the long strips together. I didn’t really understand what she meant at first, but I took her advice knowing it would make sense when I actually got to stitching. Essentially, the bulk of extra fabric from one set of seams goes one way, and the bulk of the other set of seams goes the other, so when you put them together to sew the long seam, they sit flush and you don’t have double extra fabric on one side, and none on the other. If reading this doesn’t help clarify, just trust me. It works great.


All Done! Well, almost.

Then I sort of arbitrarily pressed the final seams and my quilt top was finished!! It only took about three days from start to finish, which is indicative of how simple the design was and how easy it was to construct. I have watched a tutorial on how to easily finish and quilt a small project like this, so I will be sure and write about it when I do. It looks remarkably like the software mock up and that is also super encouraging. I am actually really excited to do my next one!! Look for the pattern for my first quilt design in our shop!
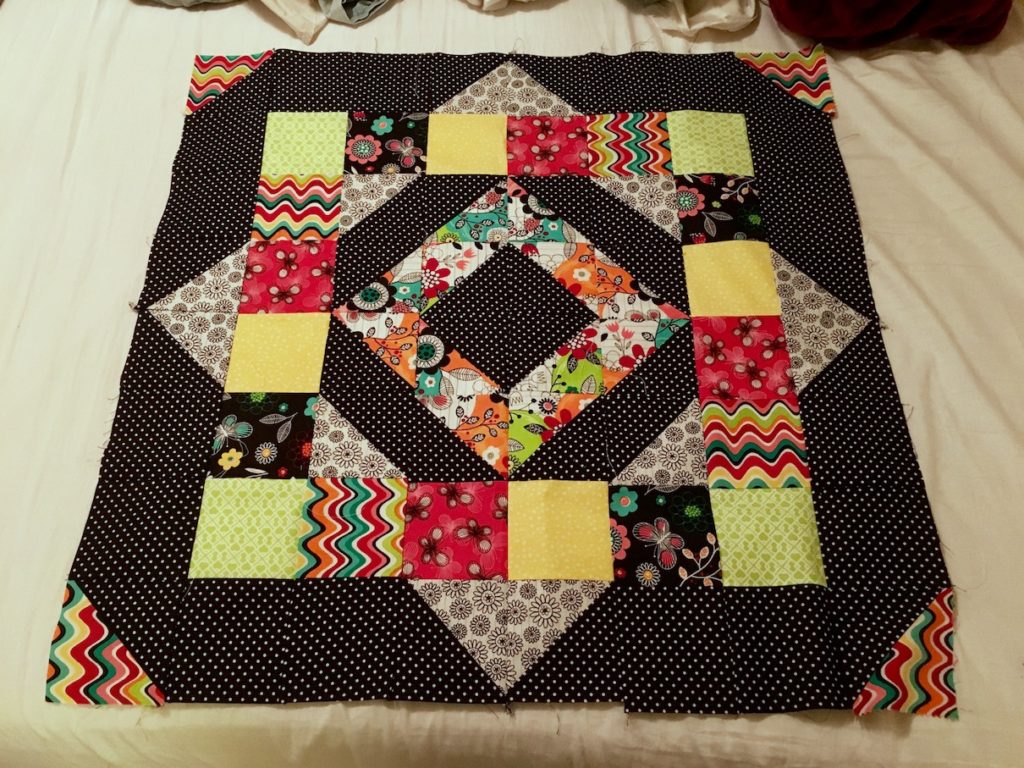
Finished Quilt Top

Quilt Top Finished!

Unconventional Beginnings

A bit of personal background, or why computers and quilts can be friends.

I have been working with digital images for as long as I can remember. When I was in high school or younger, I would spend hours just playing with whatever digital design software was available to me, whether it was MS Paint or Photoshop. Designing t-shirts, posters, logos, or any other design gig I could get came naturally and I was happy to do it! Several of them are still in use today (I linked to my high school theatre program, and tried to link to my dad’s bicycle logo which has gone far and wide on bike shirts, trailers, and everything in between).

There were a few specific features in Windows 3.1 that helped me understand the concept of pixels. You could choose adesign to be your background that was essentially a simple, very small image, tiled to look like a continuous design. There was also the option to create your own tiny image and this was super fun to play with and try to make your design match up in clever and different ways. We also had a program called Tesselmania (which I think is defunct, but the author created TesselManiac and it is very similar to what I remember) that allowed you to create repeating designs that were much more complicated. These were really all just more reasons for me to sit in front of the computer for hours on end.

On the other side…

Since I can remember, my mom and grandmother sewed clothes, crafts and quilts.  The past few years, when my mom has been assembling quilt designs using 2″x2″ squares, they seem like pixels, or different repeating quilt tiles remind me of those repeating tessellations.

When I was pretty young, early high school or earlier probably, I acquired a cross-stitch pattern book from who knows where. This one had a bunch of small projects to fit in a 4″ hoop or smaller and I decided to do one that said, “I’m not messy, I’m an artist”. This spoke to me. I have distinct memories of looking at it and thinking, “Oh, I should be able to hammer this out in an hour or so,” and it taking MUCH longer than I anticipated. I also remember hot gluing it to a round circle of cardboard instead of mounting it into a hoop. After it was glued to the circle, I glued a magnet to the back of it and it lived on our fridge until… gosh, my sister may still have it for all I know.

Despite having embroidery floss all over the place (ostensibly, to create these) and one giant dolphin cross-stitch kit that I had zero hope of even beginning, let alone completing, I didn’t actually attempt another cross stitch until a couple of years ago. I happened across a ton of snarky Pinterest boards that had cross-stitch projects with TV quotes or 8-bit video game characters or just profanity and I thought, “Oh yeah, I can get behind this.”

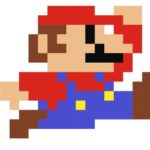
8-bit Mario

Pulling it all together

Cross-stitch in general just clicked and made sense to me because of all of the time I spent goofing around with low resolution images in my MS Paint and Windows 3.1 days. The 8-bit characters as cross-stitch projects is such a brilliant crossover from technology to craft. What is original Mario if not a cross-stitch pattern waiting to happen? All of the original patterns in our shop intentionally leave each square complete to retain that jagged, pixelated look.

I started this website because I love technology and design, and I also love crafting and creating. What a great way to marry these interests and maybe inspire some computer geeks out there to put down the laptop and pick up a new hobby.

Cross Stitch Tips and How To’s

Interested in learning to cross stitch? Did you see one of our delightful patterns and feel compelled to create some sweet art? That’s great! Cross-stitch has been around for quite a long time, but only recently has it become popular to combine the traditional craft with non-traditional subject matter, like pop culture references or video game characters. The juxtaposition of seeing unusual sentiments or images immortalized in cross-stitch can be a lot of fun and it can appeal to many different kinds of people: people who are geeks about specific pop culture, or people who just love to craft! Even if you’ve never crafted before, cross-stitch is pretty straight forward and a little like paint by number or coloring in a coloring book. I’ve put together some helpful cross stitch tips and how to’s to get you going.


To get started, you’re going to need a few things:


  • Cross-stitch fabric – 14-count is standard, but you can make the finished piece larger or smaller if you use a different count. The higher the count, the more little squares fit into an inch of fabric and the smaller your design.
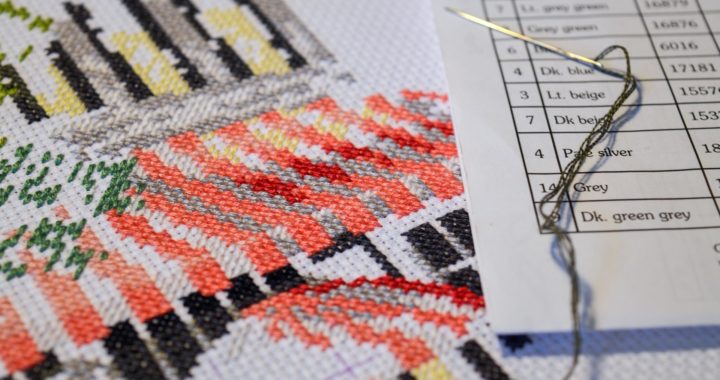
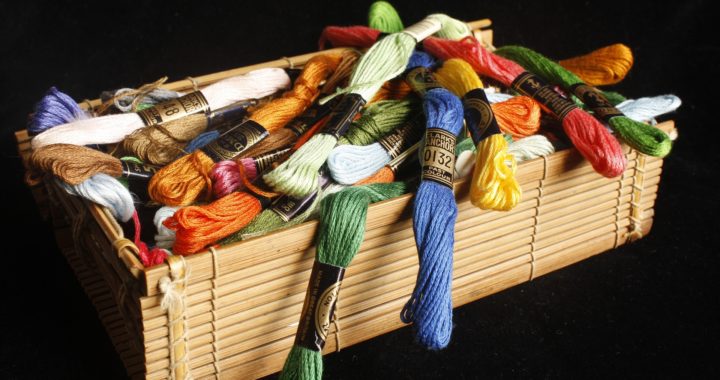
  • Embroidery floss – On all Handmade Geek patterns, there is an included chart for the official DNC colors, but if you want to change some of the colors, go nuts!
  • A size 24 tapestry needle – Available anywhere embroidery materials are sold.
  • Embroidery hoop (Optional) – You can use an embroidery hoop to hold the fabric taut while you work if it helps you, but it is not necessary. I actually just hold the fabric in my hands. Fresh cross-stitch fabric has a bit of stiffness to it that is more than enough stability for me to work. It also allows me to fold my work up (carefully!) and carry it in a plastic pencil box! So portable! Either way, the most important part is that the stitches are even and don’t get too tight and bunch the fabric up. If you decide to use the hoop, it can be plastic, wood, or whatever you like, but it’s important that the hoop clamps the material all the way around. For most of the patterns on The Handmade Geek, a 5” or 6” should be sufficient.
  • Scissors – For cutting embroidery floss and cutting the fabric when your design is finished. The sharper the better!


IMPORTANT TIP! Separate the embroidery floss strands.

When you look closely, the embroidery floss is actually like a tiny rope with six little strings in it. I like to cut the embroidery floss first, then carefully separate two of the strings out to use at a time. I once tried to use a full six strings because of laziness… trust me. It does NOT work.


Orienting your design:

Find the approximate center of the pattern, then, find the approximate center of the fabric. Start stitching something that’s close to the center of the pattern. Starting in the middle will ensure that you have enough fabric on all sides to complete your design. Running out of room is no fun.


Stitching Types:

I make it a practice to only use the basic “X” stitch in designs on The Handmade Geek. It makes it look more like computer pixels to me. Patterns from other places may have straight lines in the design or even what amounts to filling up half of a square by stitching through the middle. These are great, but unless noted specifically, our patterns are just a bunch of “X”s.


Begin your project:

Choose or cut a length of thread, 15”-18” is about right. There are a couple of ways to anchor the thread while you work. You can either leave a short tail on the back of the project (1” or so) and make sure your first several stitches cover it to hold it in place, or tie a small knot in one end to keep it from going through the fabric. Sometimes, if there are already lots of stitches in the vicinity of where I want to stitch, I will run the thread underneath the existing stitches. If you’re not sure, try both ways and see which one you like.

In general, I like stitching over the tail because it’s a little neater on the back of the fabric and if you want to frame your work, the finished product lays flatter. Fair warning: you will lose your grip on the tail and have to re-stitch those first couple more than once. It’s okay. It happens to the best of us. (If you would like to see stitching in action, there are many great YouTube tutorials and The Handmade Geek will be creating our own tutorials soon!)


Stitching Tips:

There are two basic methods to create your “X”s. The first is to stitch a complete row of half stitches (/ / / /), then come back (\ \ \ \) to create the “X”s. This is what you’ll use for the majority of your stitching. The other method is to stitch each individual X as you go. This method is good for vertical rows.

Conventional cross-stitch priority is that all of the “X”s cross the same direction. So, when you look at the “X”s, the top thread slants the same way (either \ or /). I have read that if you mix your stitches and the top thread is not consistent, the piece looks uneven. Perhaps I am not patient or detail oriented enough for that, but I often cross all kinds of ways and I think the pieces end up looking fine.

I guess, in general, I usually keep them slanting the same direction if they’re on the same row, but, meh. Once you hit them with an iron, the whole piece is so smushed you can’t tell the direction of the slant unless you’re looking for problems. If crossing the same way is important to you, then you do you. But, in my book, as long as the stitches are the same size and tension, which thread was on top didn’t bother me. Have fun! Be free!


Finishing:

After all your piece has been through, a quick hand wash in some cold water with Woolite or very diluted detergent can be nice. Lay it out or hang it to dry fully, and press with an iron with lots of steam. Be careful not to scorch! If it does scorch, don’t freak out. You can usually get it out if you gently wash it again, assuming it’s only slightly toasted and the fabric isn’t damaged.

When I’m finished, I center the design in the frame, cut the fabric to size, and just mount it under glass. There are ways to mount it to foam board or to pillows, but I am always so excited to see my finished work in presentation, framing is my go to. You can get all kinds of cheap frames at Goodwill or other thrift type stores and sometimes the design of frame will help you choose the project! How fun and creative! If you’d like to sew your design to a pillow, or mount it in any other way, there are YouTube tutorials for those, too.


Happy stitching!!


(I include these directions with every pattern we sell so that you can easily reference them while you’re working.)

Confession of a Cross Stitcher

Confession:

Am I the only one who gets a fabulous idea for a cross stitch, designs it, sketches it out… and then doesn’t finish it?! I have at least 2 that are just in the chute, totally ready to go, but not started. I love the design process- all parts of it really. The layout, the font, the ornaments, and then the thread. Ohhhh… the thread! I am obsessed with all embroidery floss all the time. I can’t have too much and I always pick the same colors. It’s a wonder that everything I own isn’t electric blue.

Tell me I’m not alone in this! 


Thread and Roses

Hello world!

Hello, world

Well, truly hello! We are just some crafty geeks (or geeky crafters, depending on how you look at it) and we want to bring some great patterns and crafts to this big ol’ internet! We definitely take requests and if there is anything on this site that you’d like to purchase, send us a message and we’ll see what we can do!

Looking forward to crafting with you!