
Seeking Indoor Entertainment
Hello out there, everyone! With the impending hurricane potentially cooping us up in our house for a few days, I thought making a small quilt- or at least the top- might be a fun exercise! To give some context, I am reasonably competent with a sewing machine, although sometimes it’s not a great medium for me given my impatience and tendency to wing it through projects and not do things according to the actual instructions.
Whenever I feel crafty, I usually cross-stitch, and short of running out of thread or starting too close to the edge, there is not much that can go catastrophically wrong. Sewing, on the other hand, has MULTIPLE reasons it could go wrong at any turn! Or, at least, I feel that way. So I’m going to conquer my quilting fear, be exceptionally detail oriented, and measure twice before cutting. Here we go for my first quilt ever!
The Wind Up

Rotary Cutter, Board, and Acrylic Ruler
I got this crazy idea at about 9:45pm last night, so my fabric choices were limited to what was prepackaged at Walmart. Not terrible, but not a huge selection when you’re talking about JUST charm packs and fat quarters. I chose a couple of different kinds, some prepackaged batting, a rotary cutter/cutting board set, and an acrylic ruler. (I have plenty of thread at home, but that’s another important consideration!!) I came home and, because I insist on being different, designed my quilt top.
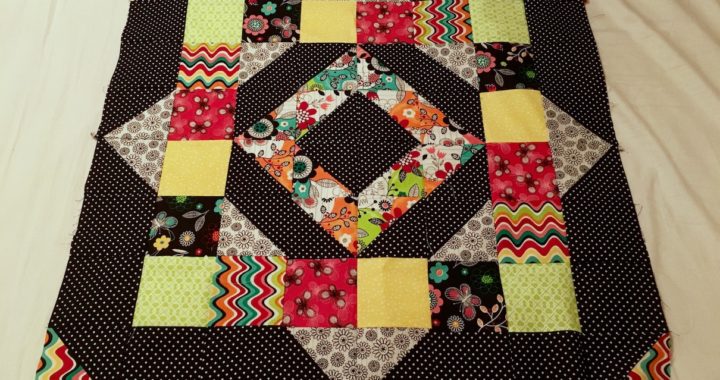
I have a few designs in the hopper, but I haven’t actually written out the patterns because I don’t really feel qualified. Hopefully, my experience this weekend will bolster my confidence enough to let me feel okay about writing out quilt pattern instructions. After some trial and error, I decided on a pattern using full squares and half square triangles. To lay out which prints would go where, used a combination of fabric on my design wall and super high-powered computer graphics software not at all intended to be used for this. The design wall would definitely suffice, but as I said: I like to be different. Here is the design I will be quilting:

I can’t think of a name for my block! It feels insensitive to name it Harvey… :/
Those are actual photos of the different fabrics in the charm pack. It helped to simulate what the finished piece would look like and help me calculate how much I needed. Each of those little squares will finish at 4”, so the whole thing is kind of an odd size of 32” x 32”. Wall hanging? Centerpiece? Cat bed? Who knows. Whatever, this is more for the experience than the final product anyway.
Prep Work
Having already ironed all of my fat quarters that would be the “background” fabric, the next step was cutting them into 5” squares.  I have not had good results with a rotary cutter in the past- not in a dangerous way, just in a going too quick and messing fabric up way- so I was hesitant to do this part. I wish I had Handmade Mama’s fancy die cutter. That thing would make quick work of these little squares. Anyway, having not used a rotary cutter in a LONG time, and really wanting to do it right, I did what anyone would do: consulted Youtube.

Background strips before cutting into squares.
This video was very helpful, and with a helpful tip from Handmade Mama about stacking the strips at the end, it wasn’t so bad. Got all of the background fabric cut and ready to start sewing!! Eeee! So excited!!
Assembly
 So I paired up the background squares with the right fabric from the charm pack and matched them up wrong sides together. Then, the directions are to draw a pencil line diagonally across the back of the fabric, sew a 2 seams, each 1/4” on either side of that diagonal line, and then cut along the pencil line. What you’re left with are 2 4 1/2” squares with one triangle of background fabric, and one triangle from the charm pack. Seems easy enough.
Well.

Thread Tension Problem
Sidebar:
I really do like my sewing machine. It’s a vintage Singer 500A, otherwise known as a Rocketeer. It’s heavy duty and even though it was made in 1960’s, it sews like a champ and if it starts to get wonky, I know a guy at a local shop who will refurbish should I decide to do that. That said, I have pretty much always had issues with the thread tension. I don’t know why, but I have never really been able to get it right. I usually just press on, but in the interest of being very particular, I called Handmade Mama to try and help me fix it.

Squares Curling at Edges
What was happening was when I sewed across the triangle, the thread was too tight or something and it was making the squares curl at the edges. What I didn’t realize until later was that it was also moving the fabric on the underside around in such a way that it wouldn’t have made even, equal squares, anyway.
After Mama talked me down from my swearing, getting ready to give up ledge, I changed the sewing machine foot and it corrected the problem. However, I had put together all but one of my squares, so now I get the pleasure of ripping almost every one of them apart and re-stitching them. Hooray.

Flat Square
The Do Over

Cutting Half Squares
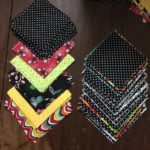
Re-stitched the squares so that they laid flat, and then used the rotary cutter to cut diagonally along the pencil line, as per the instructions. Then, in what is becoming a regular occurrence, I looked on YouTube for instructions on how to properly iron the half square triangle so that they would lay flat in a square shape. As usual, Youtube has everything, so I watched the video and got to pressin’.
It is at this point that I am noticing the pinked edges of the charm pack are making some of the squares feel a little wonky, so in the future, unless I need a full 5” square, I’m going to cut the pinked edge off and let it be straight.

Pressing Half Squares

Design Wall Quilt
Putting it Together
After pressing all of the squares, I put the quilt together (well, all that would fit) on the design wall. From there, since this wasn’t an overly complicated pattern, and the squares were pretty big, I just picked up each square from the first column- in order- and stitched them into one long complete strip. Then I did the same with each column after that. If the pattern was more intricate, I would have pinned the pieces together end to end so I didn’t get them out of order or turned the wrong direction.

You can see the way the horizontal seams nest along the vertical seam.
Then Mama gave me some more advice I wouldn’t have thought about: when you press the seams of the long strip, alternate the direction from one strip to the next, and then the seams “nest” when you sew the long strips together. I didn’t really understand what she meant at first, but I took her advice knowing it would make sense when I actually got to stitching. Essentially, the bulk of extra fabric from one set of seams goes one way, and the bulk of the other set of seams goes the other, so when you put them together to sew the long seam, they sit flush and you don’t have double extra fabric on one side, and none on the other. If reading this doesn’t help clarify, just trust me. It works great.
All Done! Well, almost.
Then I sort of arbitrarily pressed the final seams and my quilt top was finished!! It only took about three days from start to finish, which is indicative of how simple the design was and how easy it was to construct. I have watched a tutorial on how to easily finish and quilt a small project like this, so I will be sure and write about it when I do. It looks remarkably like the software mock up and that is also super encouraging. I am actually really excited to do my next one!! Look for the pattern for my first quilt design in our shop!

Quilt Top Finished!